This tutorial is all about combining colors. You'll learn how to select a mat color that suits the clip-art or photo that you've chosen as the central theme of your greeting card. This tutorial builds on elements presented in the first tutorial, Four Patch Cards. Refer to that tutorial for instructions on making card blanks and envelopes.


Combining Colors
Some beginning card makers have a hard time combining colors in a
pleasing way. One way to address this problem is to minimize the
color choices. In week one, we did this by using a single color or a
single sheet of decorative paper. This week, we'll add another
color choice by matting clip-art and photos. What's interesting about the color
of a mat is that it can both enhance the color of the image and
set the mood of the card.
Card Mats
A card mat is simply a piece of paper or cardstock a little
larger than the clip-art or photo. The mat is used to create a frame
around the image. Its main purpose is to draw the eye to the image's
focal point. If you plan to make cards regularly, it's convenient to have
mats pre-cut in a variety of colors. Letter-size colored paper cut into
quarters and 12" by 12" scrapbook paper cut into six 4" by 6" mats both
work well. For a group or class, buy a ream of colored paper in a variety
pack—pastels, brights and darks. For home card making, it may be most
economical to buy a pack of 6" by 6" or 4½" by 6½" cardstock in a
variety of colors. For the best buy, look for value packs of 100 sheets.
Clip-Art
Clip-art comes with most word
processing and graphics programs and is also freely available on the internet. Just search for the picture you want and include "clip art" or
"illustration" at the end—like "birthday cake clip art" or "zodiac
leo
illustration".
Clip-Art Cards
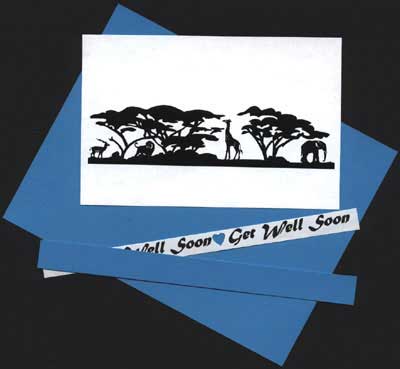
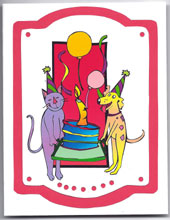
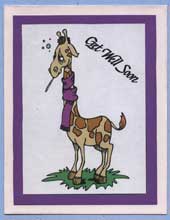
Since this week is about matting and color choices, our first sample card
features black and white clip-art. This makes the mat color choice very
simple and allows for the easy introduction of matting. After that, we'll
go on to learning how to mat colored clip-art and photos.

Follow the steps below to make a black and white clip-art or photo card, then read on for how to select mats for colored clip-art.
Select and cut a mat using heavy paper or cardstock of any color except black or white. You might select a favorite color, or just the use the paper that is most convenient. Cut the mat to about 3¾" by 5" for a 4¼" by 5½" card, or cut a mat ½" (1 cm) smaller than the card blank you are using. For a 5" by 7" card, the mat would measure 4½" by 6½". (See the first card tutorial for how to make a card blank.)
Mats can also be cut in other shapes. Print the templates in the Shaped Frames download on colored cardstock, and cut them to size. To make clip-art and photos in these shapes, trace around a cut-out frame on the back of the clip-art or photo with a pencil, then cut.
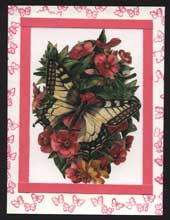
Tip: Check the sidebar for colorful patterned frames to use to mat photos on your greeting cards.
Select a black and white image for your card. It could be a favorite photograph or clip-art downloaded from an online site. The image used in the sample is available in a PDF file.
Print the clip-art or photo and cut it to about 3¼" by 4½".
Center the clip-art on the mat and glue in place, then glue the mat with clip-art to the card front. Now that you have seen how to do matting, continue below with how to mat colored clip-art and photos. Examine the sample cards with colored clip-art in the tips section for ideas and examples.
That's it! Now you can give your
clip-art cards a lift!
Selecting Mat Color for Colored Clip-Art or Photos
It is usually best to select a mat color that matches a secondary
color in the clip-art or photo: in essence, an accent color as opposed to the
image's main color. Take, for example, this butterfly clip-art from Microsoft.
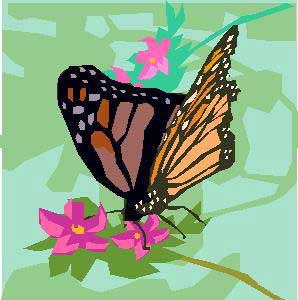
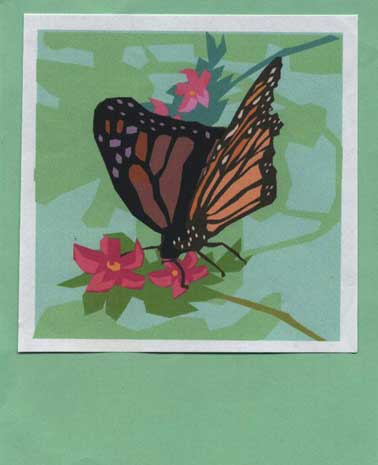
The main colors are the oranges and black of the butterfly, while the accent colors are the pinks of the flowers. The background colors are various greens. Let’s see how different mat colors look.
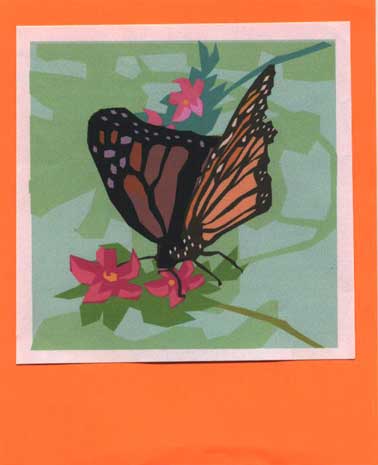
Main Color – Orange Mat
Background Color - Green Mat
Secondary (Accent) Color – Pink Mat
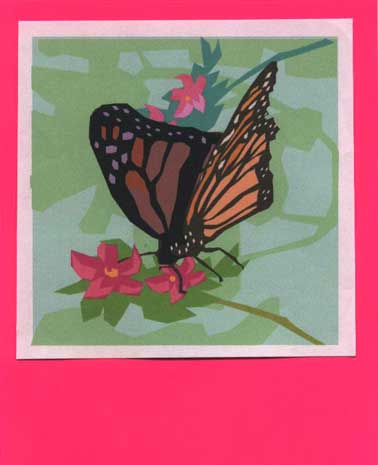
All of the mat colors coordinate well with the clip-art, but each has a different effect. The orange mat tends to compete for attention with the butterfly. The green mat simply extends the background and makes the orange butterfly appear duller. The pink mat (secondary color) adds dimension to the clip-art, and the butterfly seems to come off the page. Move your chair back from the screen to see these effects the best.
Also notice the white border around the clip-art. This separates the mat from the clip-art and adds a more finished look. Experiment on your own to get a better feel for how mats work with colored clip-art and photos.
Back to Top
Tip: Pull the overall design of the card together by matting the card message and image with the same color.
Tip: Mats and clip-art can be cut in shapes other than squares and rectangles.

Printable: Print the Frames for Clip-art or Photos on cardstock. Cutout the colorful frame of your choice to mat clip-art or a photo—glue in the center of the frame or cutout the opening and glue the frame over the clip-art or photo.
Tip: This is an especially nice alternative for adding photos to a greeting card.
Tip: Save paper by using strips of paper to mat the clip-art instead of one large piece of paper.

Tip: A scalloped edge is a terrific way to enhance a clip-art card! See how to do it in the Scalloped Edge card tutorial.
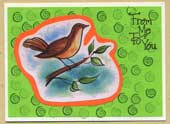
Tip: Plain colored mats can be decorated with rubber stamps.
Tip: Cool colors, like blues and greens, are calming. When used as mats, these colors tend to stay in the background. Warm colors, like yellow, red, or orange, give a lively feel to a card. When used as mats, these colors have a tendency to stand out from the card.