
In this tutorial, make a birthday card featuring a child's (or adult's) age as a pop-up. There's something almost magical about pop-ups that delights both children and adults. The pop-up mechanism in this card is the V-fold—one of the most versatile types of pop-up. After you make this card, you will be able to add a similar V-fold pop-up to any greeting card.
This greeting card tutorial builds on previous tutorials in the original Greeting Card Class set of tutorials. If you are new to cardmaking, review these tutorials for ideas and basic techniques.
Related crafts: See more Pop-up Cards crafts.
Refer to Card Class Tutorial #1: Four Patch Cards for how to make card blanks and envelopes.
The birthday card features a purple card with a white cardstock insert/pop-up mechanism. On the front of the card are pink candles with yellow flames on a purple polka-dot background. The pop-up inside the card is a large number "6" made of pink cardstock, with an optional stamped bird on yellow cardstock. Use whatever colors you like. Aunt Annie offers polka dot digital paper downloads in many colors.
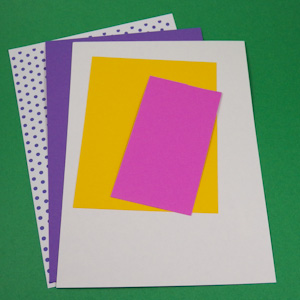
Print Aunt Annie's purple polka dot digital paper on white paper and cut a 5" by 3¾" rectangle to use on the card front. Cut a 5″by 8″piece of white cardstock for the card's inside. Quarter sheets of yellow and pink cardstock will work for the other card elements.
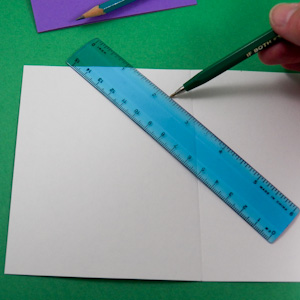
Use the bone folder or empty ballpoint pen to score the center of the white cardstock. Fold in half.
Open the white cardstock flat. At the top center of the cardstock, use a ruler to measure 1¼" from the center fold and make a faint dot with a pencil. Do this on both sides of the center fold. Measure 1¼" down from the top along the center fold and make another mark. Join the dots with diagonal score lines that form a "V".
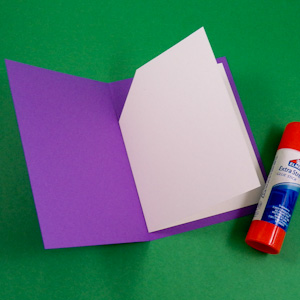
Glue the white cardstock inside the purple card blank. Put glue on back of the right side of the folded pop-up mechanism and adhere it to the right side of the opened card. Put glue on the other half of the white cardstock and fold the card closed. Rub to ensure a firm hold.
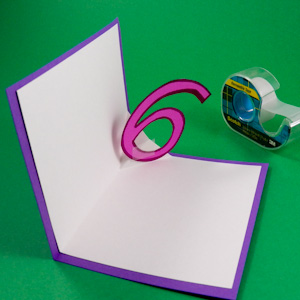
The pop-up for our birthday card is the child's age with an optional birdie add-on. Use the pencil to lightly draw a large number on the pink cardstock. Cut out the number and outline the edges with a pink or purple marker.
Tape the number to the right side of the V-fold with removable tape. Adjust the number's placement, making sure it is hidden inside the card when it is closed. Glue the number in place.
Tip: If you are adding a stamped birdie to the top of the number, be sure to test it with removable tape, too.
Project extra: Download Aunt Annie's printable pop-up numbers pattern with 3" number templates that you can use to make the age pop-up for your birthday card. Just cut out and trace the template onto colored cardstock.
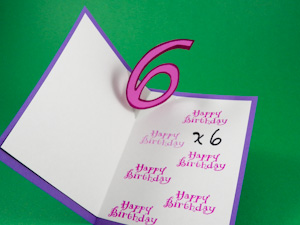
Finish up the card's inside by adding a message. It can be something as simple as stamping Happy Birthday once for each year and adding "x 6" (Happy Birthday times six).
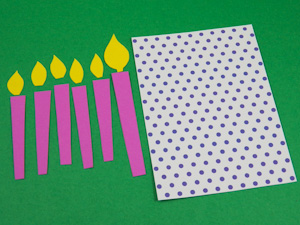
For the card front, cut candles and flames—one for each year. You can make all the candles the same size, or make one large one and several smaller ones. Adjust the sizes to fit the card front.
Project extra: Download Aunt Annie's printable candles pattern with templates and cutouts and print on cardstock. You can either cut out the colored candles and flames in the number needed or, for other colors, cut out and trace the white candle and flame templates onto colored cardstock.
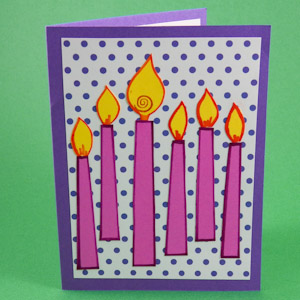
Outline the candles with a pink or purple marker. Outline the flames with an orange marker.
Glue the purple polka-dot mat to the card front, then glue the candles and flames in a pleasing arrangement.
That's it! Use the same V-fold mechanism
to make pop-up cards of your own design.
