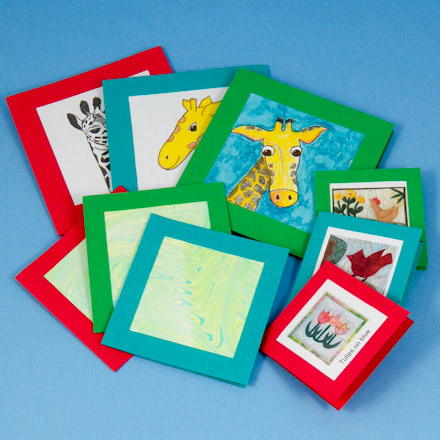
Make these very special gift tags / gift enclosures by framing clip-art, small photos or pictures cut from wrapping paper and magazines. This is an easy way to personalize any gift!
Tag idea: You can delight a grandparent with a gift tag framing the smiling face of a grandchild. They can take the framed picture right off the gift and put it into their wallet.
Choose the size of gift tag you want to make. Print the selected pattern on colored paper or cardstock. The framed gift tags are offered in three sizes. The largest tag size works with a 2½" picture, the medium size with a 2" image, and the small size frames a 1½" picture.
Tip: If you don't have colored paper, use the patterns with colored tags. You might also try printing a digital paper on white paper before printing the gift tags on the reverse side.
Patterns are Adobe PDF files. The Adobe Reader is available for free.
All of Aunt Annie's Crafts project patterns are designed to be printed on standard letter-size paper (8.5"x11" or A4). When printing from Adobe Reader, you may need to select "Auto-Rotate and Center" or "Choose paper source by PDF page size" to ensure the best fit.

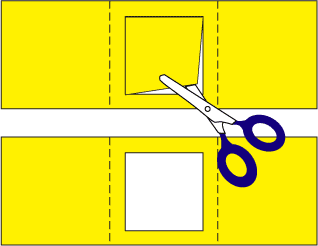
Cut each tag on its black rectangular outline. Cut out the square in the middle of the tag pattern.
Tip: With straight cuts and square corners, the tags will fit together better.
Cut a small picture, piece of clip-art or photo to display in the frame. For the larger frame, cut the picture a bit larger than 2½", for the medium frame 2", and for the small frame 1½".
Score the tag on the two dashed lines. Fold, then unfold, on the scored lines.

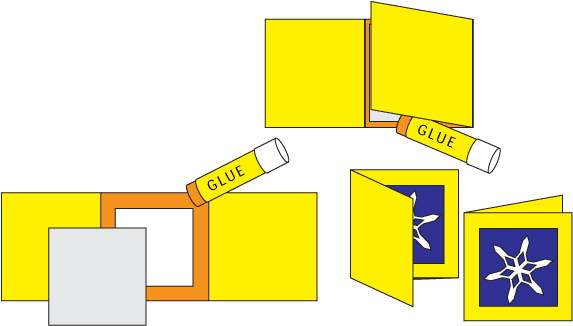
Glue the picture to the inside of the frame. Fold the shorter side over the back of the picture and glue in place. Fold the framed photo over to make the tag cover.

Write your message on the inside of the tag. Attach it to the gift package with tape or glue; or, you could punch a hole for ribbon.
Tip: Use a framed tag as a miniature photo album by folding the blank side over to cover the photo. Decorate the cover with a sticker or a message. Give it to someone special or carry it with you in your pocket, wallet or purse.
Your gift tags are done!
