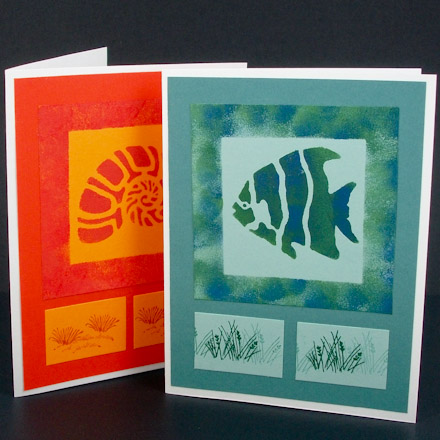
How to Make Stenciled Greeting Cards
Read through the tutorial before starting.
- Step 1: Stenciling Basics
-
The biggest challenge in using paints with stencils is getting a clear image without any smudges,
blurs or bleeds. Here are some stenciling tips:
- To avoid blurs, use masking tape, drafting tape or repositionable adhesive spray to hold the stencil in place.
Masking tape can rip a card when removed. To avoid this, put the masking tape on your clothing first.
This picks up some lint and reduces the stickiness of the tape.
- To avoid smudges, cover any parts of the stencil not being used with masking tape. Also cover exposed
areas of the card with pieces of scrap paper or cardstock.
- Slightly dampen the sponge before loading it with paint.
- To avoid bleeding around the edges of the stencil, use as little paint as possible. To do this, only
use a few drops of paint and dab the sponge up and down several times in the small puddle. Next, test
the paint on a scrap of paper by dabbing up and down a few times. The paint should be almost transparent
on the first dab and grow darker as you dab more. If the paint doesn’t dry almost immediately, either the sponge
is too wet or you are using too much paint.
- Dab straight up and down—no swirling, no pulling across like a brush—just straight up and down.
This will prevent paint bleeding under the edge of the stencil.
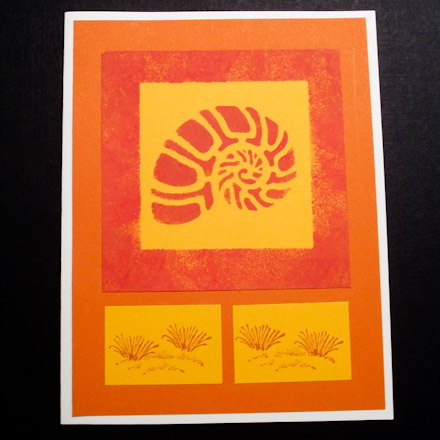
To make a simple stenciled card, like those pictured in this
project, first
try stenciling on some scrap paper, then proceed to the next steps.
- Step 2: Cut Cardstock
-
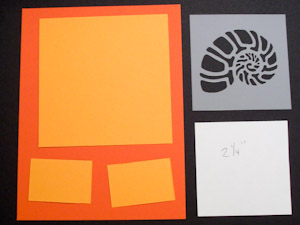
- Select two coordinating colors of cardstock.
- Cut a 4" by 5¼" mat from one color of
cardstock.
- Cut a 3¼" square and two 1½" by 1"
rectangles from the other color of cardstock.
- Cut a 2¼" square from a scrap of cardstock.
- Step 3: Stencil
-
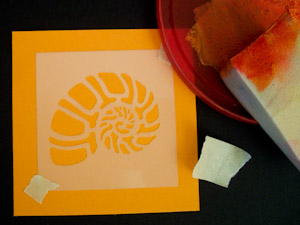
- Select one or two colors of acrylic paint that coordinate with the cardstock.
Be sure that the paints are well mixed.
- Center the stencil image on the 3¼" square and secure with masking tape, drafting tape
or repositionable spray adhesive.
- Put a few drops of paint on the plastic lid and load a dampened sponge with paint. Dab up and down
on the stencil until you achieve the desired darkness and shading. Carefully remove the tape, then remove
the stencil by lifting straight up.
- Step 4: Sponge Border
-
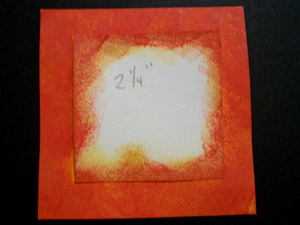
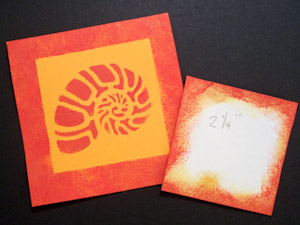
- After the paint is dry, center the 2¼" square of scrap cardstock over the stenciled image.
Secure it with a masking tape roll on the back of the square.
- Create a border by dabbing the sponge along the edges.
- Remove the 2¼" square to reveal the border.
- Step 5: Assemble Card
-
- Stamp images on the two small rectangles.
- Assemble the card by gluing the stenciled image and stamped rectangles to the larger mat,
then gluing the mat to the card.
Your stenciled card is done!
Keep up with Aunt Annie's Crafts on Facebook,
RSS feed or
with our newsletter.
