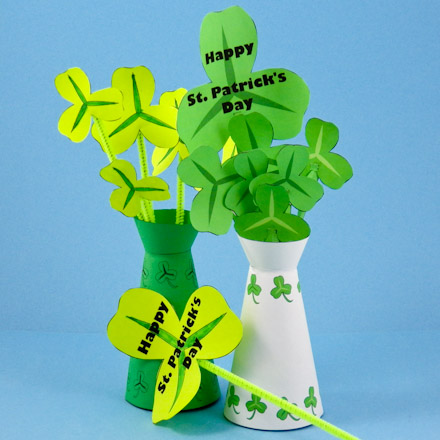
Use the printable pattern in this project to create a small centerpiece for St. Patrick's Day that consists of several sizes of paper shamrocks and a shamrock vase. Make several of these cute little vases as party favors, or as gifts for St. Patrick's Day. The plain version of the vase can be used for other occasions and be filled with Paper Flowers.
Related crafts: Checkout St. Patrick's Day crafting for more shamrock crafts and downloads.
Choose a Shamrock Centerpiece pattern to print. Use the color pattern with white paper, and the black & white pattern with green paper. Or for St. Patrick's Day variety, print the Plain Vases pattern on the reverse side of any Shamrocks digital paper. For another holiday or occasion, or for the most creative flexibility, print one of the plain vase patterns on another digital paper or, for coloring, plain white paper.
Patterns are Adobe PDF files. The Adobe Reader is available for free.
All of Aunt Annie's project patterns are designed to be printed on standard letter-size paper (8.5"x11" or A4). When printing from Adobe Reader, you may need to select Auto-Rotate and Center or Choose paper source by PDF page size to ensure the best fit.
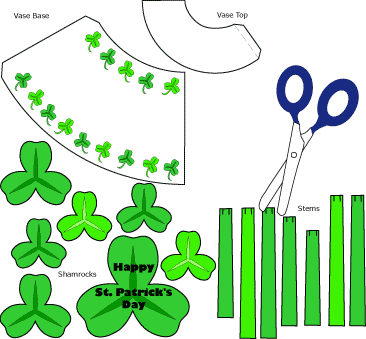
The Shamrock Centerpiece patterns include pattern pieces for three sizes of shamrocks, stems and one vase. Cut out each pattern piece on its black outline. Also, snip the two tiny lines at the top of each stem.
Tip: If you printed the black & white pattern on white computer paper, use a green marker to color in all of the shamrock and stem pattern pieces before cutting them out.
To form the vase's base, put a small amount of glue on the glue tab. The glue tab is marked by the dashed line. Form a cone shape by overlapping the other edge to the dashed line. Do the same for the vase top.
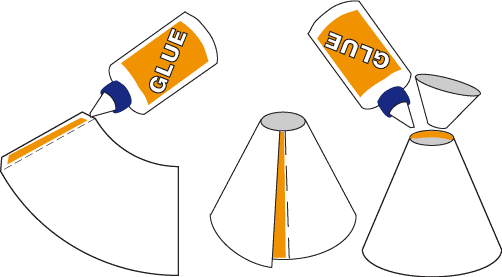
Place the base with the large end down. Put a bead of glue around the top edge of the base, and insert the small end of the top piece into the base. Tip: Use the toothpick to spread the glue.
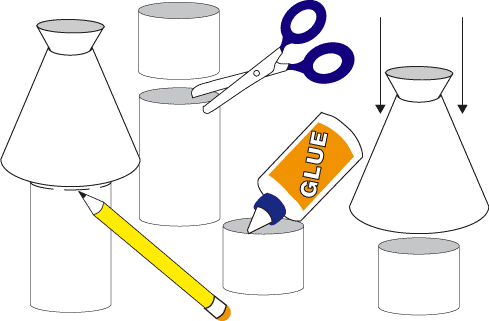
Add a ring of cardboard cut from a toilet paper tube to make a more stable vase.
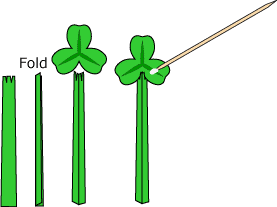
Carefully fold all of the stem pieces lengthwise. The wider end will be the bottom. Unfold the stems slightly and insert a shamrock into the tab cuts on each stem. Apply a dab of glue with the toothpick to secure the shamrock to the stem.

Insert the shamrocks into the top of the vase. They should fit snugly in the vase's small hole. If they don't, it will be harder to make a pleasing arrangement. To ensure a snug fit, you can open the stems wider, or cut a length of chenille stem to insert alongside the stems.
Rearrange the shamrocks so that the one with the greeting on it shows, and the others look pleasing.
That's it! Now enjoy your little centerpiece!
