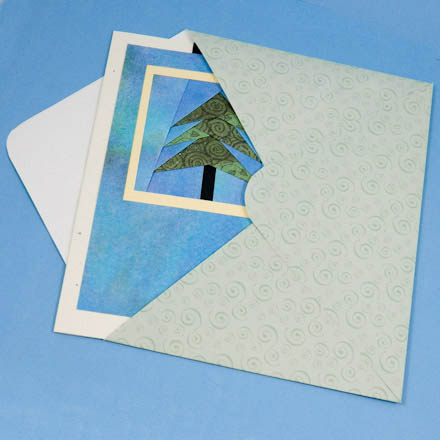
It's easy to make an envelope in just about any size. In this project, you will draw a custom pattern for an envelope in the exact size to meet your needs. Draw the pattern directly on the paper for the envelope or make a pattern that can be reused.
Related craft: For printable envelope patterns in common sizes, see the Envelopes to Make craft project.
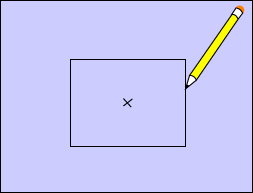
Measure the card or letter and add a little extra. (How much extra depends upon the thickness of the card or letter—usually about ¼", or 5 mm.) Draw a rectangle the measured size onto the center of a large piece of paper. Mark the center with an 'X'.
Tip: To determine the size of paper needed, sketch a small version of the envelope pattern on a piece of paper making note of all the measurements.
Tip: The pattern may fit better if the rectangle is drawn at a 45° angle on the paper. As a guide, look at the envelope patterns in the Envelopes to Make project. You might also want to duplicate some of the features of these envelopes.
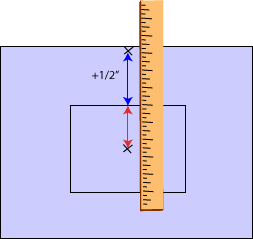
Measure the distance from the 'X' to the top of the rectangle. Add ½" to ¾" (13-19 mm) to this value for overlap. Mark a point this distance above the rectangle, in the center.
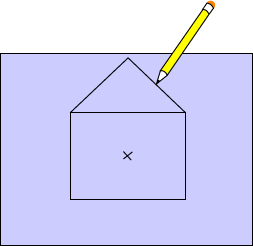
Draw lines from this point to both corners of the rectangle to form a triangular-shaped flap.
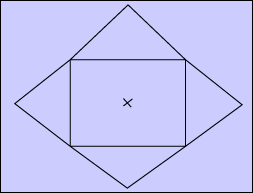
Repeat steps 2 and 3 for the bottom and side flaps, but only add about ¼" (6 mm) extra for overlap to the side flaps.
Tip: If you drew a small sketch for paper sizing, use the measurements noted to determine the size of paper needed. For the paper height, add the top and bottom flap measurements to the center rectangle height. For the paper width, add the side flap measurements to the center rectangle width. Draw the full-size pattern on the paper.
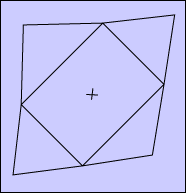
Follow the instructions in the Envelopes to Make project for completing your custom envelope.
Tip: Remember, it may be best to orient the pattern on the diagonal to get the best fit.
That's it! You
are done!
