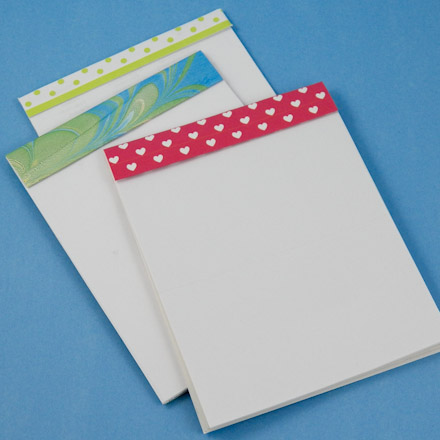
See how to make beautiful and functional notepads from recycled paper! You will use home and office paper that is printed on one side, along with scraps of leftover craft paper, to make these up-cycled scratch pads. Making the pads is as easy as "cut, stack, staple, and bind". Make several at a time, and you will always have a notepad handy when you need to jot something down or make a shopping list.
Keep several notepads on hand to give as gifts. Your environmentally-oriented friends and family will appreciate your effort to recycle paper!
Related crafts: Up-cycle drawings and other art to make Artwork Bookmarks or turn leftover craft paper into Punched Bookmarks. Bind the kids' drawings and school papers into Keepsake Booklets.
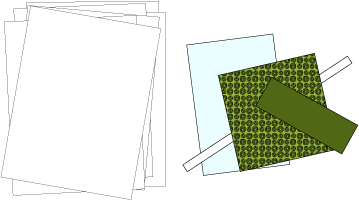 Collect
letter-size paper that is printed on one side. It is best to use
paper with printed text or just a few small pictures. You will need
4 to 6 sheets of paper for each notepad. You will also need a
quarter-sheet of cardstock, any color, as a backing for the notepad.
Collect scraps of decorative craft paper and strips of cardstock. The decorative paper for the binding strips need to be at least 4¼" (105 mm for A4 paper) by 2" to 3½" (50 to 90 mm). The optional cardstock strips need to be at least 4¼" (105 mm) by ¾" to 1¼" (19 to 32 mm).
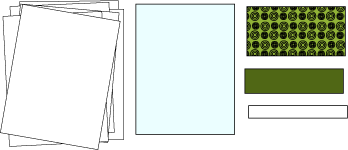
Cut the letter-size paper into equal quarters by first cutting it in half lengthwise at 5½" (148 mm for A4 paper), then in half again across the width at 4¼" (105 mm). Cut a piece of cardstock the same size as the cut paper—this is the notepad backing.
Cut one binding strip for each notepad that is 4¼" (105 mm for A4 paper) by 2" to 3½" (50 to 90 mm). For the optional layered binding, also cut a coordinating cardstock strip that is 4¼" (105 mm) by ¾" to 1¼" (19 to 32 mm).
You will also need to cut a narrow strip of cardstock that is 4¼" (105 mm) by 3/8" (10 mm) to cover the staples.
Project extra: Use the templates in the Templates / Binding Strips printable pattern (also in A4 Paper size) to aid in cutting paper and cardstock. Also, if you don't have any decorative paper, use one of the binding strips on the pattern instead. To keep with the recycling theme, print the pattern on the reverse-side of a previously printed paper.
Note: The pattern is an Adobe PDF file. The Adobe Reader is available for free.
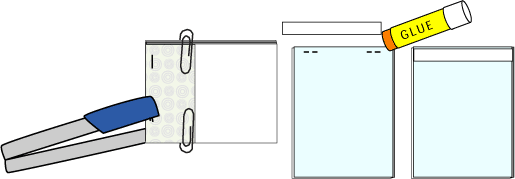
Make a stack of 16 to 24 quarter-sheets of recycled paper, blank sides up. Place the cardstock backing on the bottom of the stack. Make sure all the edges are stacked straight and evenly.
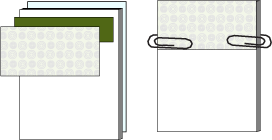
Lay the binding strip face-down on top of the stack, aligned with the top edge. Be sure that the top, left, and right edges of the binding strip are even with the stack. Clip the stack together on the sides with two large paper clips or bulldog clips.
For a layered binding, lay the cardstock strip between the stack of papers and the binding strip, aligning top and side edges.
With the stack binding strip up, staple twice along the top edge, about ¼" (6 mm) down from the top. Flip the stack over and glue the narrow cardstock strip over the staple backs. This will prevent the staples from cutting through the binding strip.
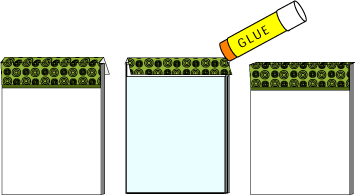
Fold the loose edge of the binding strip back, up and over the top, and to the back. Make creases as needed for a neat look.
Turn the notepad over and glue the loose edge of the binding strip to the back of your notepad. The binding strip should cover the staples completely.
Make a sleeve to protect your notepad when carrying it in a backpack or purse. Download and print the Notepad Sleeve pattern. Follow the instructions on the pattern for making the sleeve. The thumb tab at the top of the sleeve can be cut with scissors, but a 1" circle punch works even better. Just place the top of the completed sleeve partway into the circle punch to make a semi-circle cutout. Tip: For a more durable sleeve, print the pattern on heavy paper (24# or more).
This pattern is an Adobe PDF file. The Adobe Reader is available for free.
Tip: To keep with the theme of recycling, why not make the sleeve from a magazine page or an old map? To do this print the pattern on cardstock, cut it out, then use this template to trace the sleeve pattern onto your choice of recycled paper. Keep the template for the next time you need to make a sleeve.
Tip: Use the sleeve to store your handmade greeting cards. The sleeve fits quarter-fold (4¼" x 5½") cards, like those featured in Aunt Annie's Greeting Card Tutorials.
That's it! Your notepad is complete!
