

Make elegant gift and favor boxes with fold-over flaps in three sizes. Each box flares outward from a square or rectangular base to graceful lid flaps that can be left open to create vase-like displays for dried flowers and other lightweight arrangements, or rounded over to close the box for gifts, party favors, and wrapped treats such as nuts, dried fruits, and candies.
All patterns print on Letter/A4 cardstock. Print on white or colored cardstock, or on the reverse side of decorative cardstock to create one-of-a-kind boxes for gifts, favors, and seasonal displays.
| Box Name | Dimensions | Uses |
|---|---|---|
| Rectangle Elegant Box | 3¾" × 1½" × 2" (3¾") | Wrapped treats, guest soaps, cosmetics, dried lavender or herb bundles |
| Square Elegant Box | 1½" × 1½" × 2¼" (4¼") | Jewelry, wrapped chocolates, party favors, small dried flower arrangements |
| Tall Square Elegant Box | 1¼" × 1¼" × 4¼" (6¼") | Small bottles, taper candles, bookmarks, dried flower bouquets |
Each pattern is a PDF file that prints on standard Letter/A4 paper.
Choose an Elegant Box pattern and print it on Letter/A4 cardstock. Print on white or colored cardstock, or on the reverse side of decorative cardstock for a finished exterior.
Tip: For a sturdier box, print the pattern on paper and transfer it to Bristol board or similar flexible poster board.
Optionally glue decorative paper to the reverse side of the cardstock before cutting out the pattern.
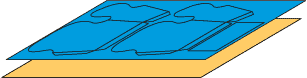
Tip: Use a permanent craft adhesive or double-sided sheet adhesive. Glue sticks generally do not provide a strong enough bond for laminated cardstock.
Cut out all pattern pieces on the solid lines. The larger pieces form the box sides, and the smaller square or rectangle forms the box bottom.
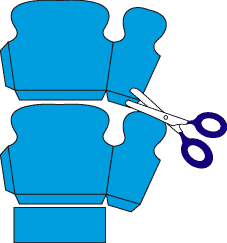
Tip: Smooth, accurate cuts make the finished box stronger and easier to assemble.
Score each straight fold line using a ruler and either a bone folder or an empty ballpoint pen.
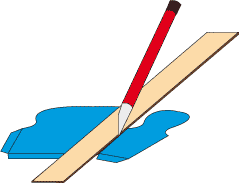
Tip: For heavier materials, make a shallow half-cut instead of an embossed score.
Fold on each scored line and crease the folds sharply with your thumbnail or a bone folder.
Glue the side tab(s) to form the box. Fold the bottom tabs inward, apply glue, and attach the bottom piece. Allow the glue to dry completely before filling the box.
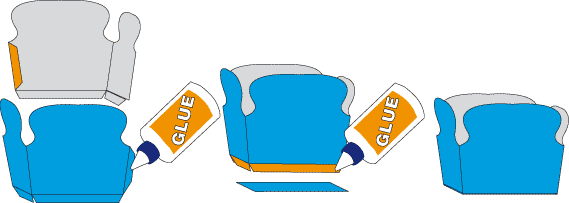
Leave the flaps open to display dried flowers or other lightweight arrangements, or fold the knobbed flaps over and tie them closed with ribbon for elegant gift packaging and party favors.

Tip: Line the box with contrasting tissue paper to cushion gifts or create an attractive display for dried flowers and other lightweight arrangements.
Tip: For more details, variations, and additional patterns, visit the Flared-Top Box page.


Flared-Top Box Craft Project
Tip: For detailed assembly instructions, printable color patterns, decorative designs, and additional box variations, visit the Flared-Top Box craft project.
Historical note: Elegant Box was the original name used for these patterns when they were first published during the site's shareware years. The craft project was later renamed Flared-Top Box.
Decorative Paper Idea

Tip: Print the pattern on one side of colored cardstock, then adhere decorative paper to the reverse side. Assemble the box with the decorative paper on either the inside or the outside. These examples were made with Cool Dots digital paper.


