Paper Cutting Techniques and Crafts
These craft projects feature paper cutting techniques that can be used to add
colorful designs to paper crafts, scrapbooks, fabrics and household
objects. Apply what you learn in these craft projects to decorate
greeting cards, in gift wrapping, and in
home decorating.
Crafts marked with
Friday Fun are great for
family, classroom, or group craft time.
Tip: Read a
brief note about paper-cutting traditions around
the world.
The projects range in difficulty from VERY EASY to
AVERAGE.
Browse down this page for descriptions and illustrations of the projects, then select a project and have
some crafting fun! Or jump to the category index for a listing of all crafts.

Description ↓
In this project, Aunt Annie
introduces you to the art of paper-cutting through the techniques of cut-apart and layered paper. These techniques can be used to decorate
greeting cards, stationery, boxes, gift wraps, or any paper craft
project.
EASY

Description ↓
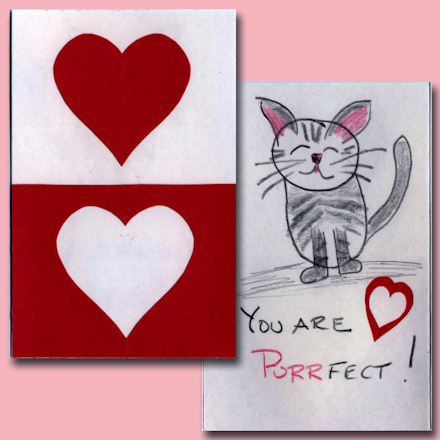
This project features the
art of paper-cutting to create Valentine's Day cards. You can easily
make unique and striking Valentines using the included heart
templates and colored and/or decorative papers.
EASY
Description ↓
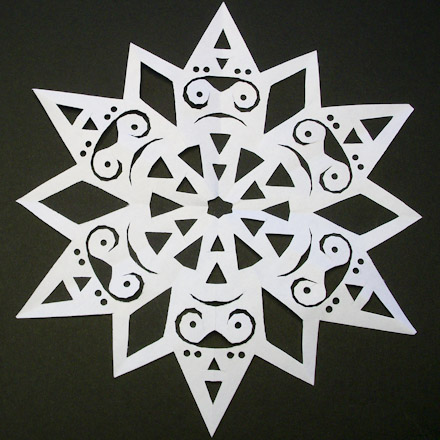
Learn how to
cut paper snowflakes. This project includes
patterns for several different snowflakes, including Aunt Annie's favorites. You will also learn about the symmetry found in every snowflake.
EASY
Learn an easy way to
cut
snowflakes from tissue paper. With this technique you can make a whole
flurry of snowflakes in a hurry! Using tissue paper makes cutting
through many layers easier, but you can use any lightweight paper you
like.
EASY
Create a chain of paper dolls by cutting multi-folded paper strips.
Learn this basic paper cutting technique with paper dolls, then let
your imagination run wild! Cut paper chains with themes for every
season and every special event. They make great decorations for
parties, classrooms and your home.
VERY EASY
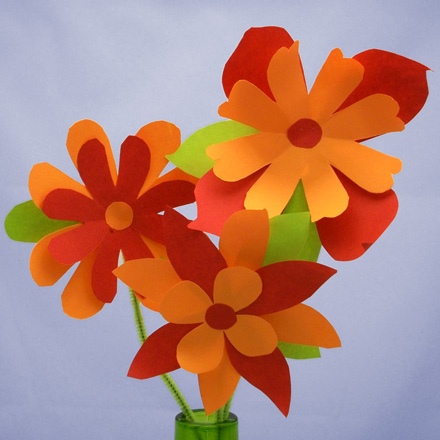
See how easy it is to make paper flowers
by cutting squares of paper. It requires no patterns
and uses simple materials. This is a skill well worth learning!
EASY
Create chains of paper hearts by cutting accordion-folded paper
strips. You can easily make paper heart chains for Valentine's Day.
It's just like cutting
Paper
Doll Chains—only easier! Use strips of red paper, plain
or patterned, to decorate for a party, in the classroom, around the
house or for a special dinner with your loved ones.
VERY EASY
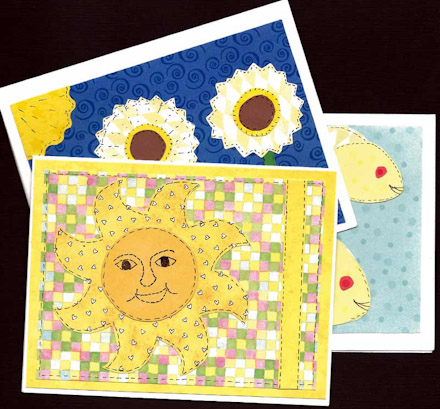
Description ↓
In this tutorial, you'll learn how to
make paper appliqué cards. Basically these are cards made from cut
paper arranged on the card to mimic the look of cloth appliqué.
There's no end to what can be done with this technique.
EASY
Need to make lots of Valentines in a hurry but still
want to show your creative flair? These easy to make Valentines are based on
hearts that are cut freehand. After some simple prep work, this project is as easy as fold, cut and glue.
Great for kids!
VERY EASY
Mom will love these pretty cards with simple
paper cutouts that spell out "M-O-M." Use whatever crafty things you
have on hand to add your special creative touch.
VERY EASY
Make these simple cards with paper cutouts that spell out
"D-A-D." It takes very few supplies to make these fantastic looking
cards. Dad (and Granddad) will love these special kid-made cards.
VERY EASY
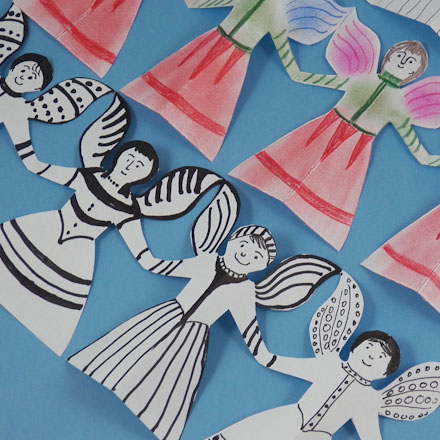
Create a chain of paper angels by cutting folded paper strips.
It's just like folding and cutting paper doll chains! The angels stand on their own and can
be used to add some sparkle anywhere you are doing some holiday decorating!
VERY EASY

Description ↓
Turn a plastic flower pot from ordinary to extraordinary with
stenciling. In this project, you will learn how to cut a stencil and
then apply acrylic paint
through the stencil to a small plastic flower pot. This technique can then be used
to decorate just about any plastic container.
AVERAGE
Keep up with Aunt Annie's Crafts on Facebook
,
Twitter
,
Tumblr
,
RSS feed
or
with our newsletter
.