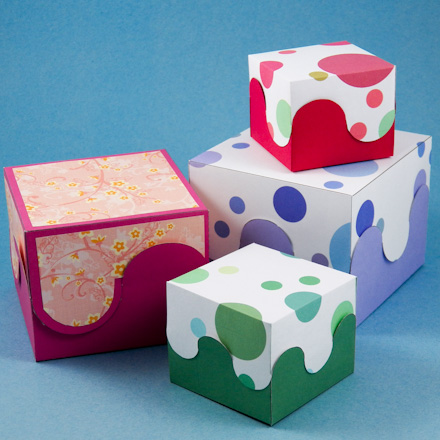
This project features striking boxes with interlocking tops and bottoms in a variety of shapes and sizes. Choose from boxes with two interlocking curves on each side, three interlocking curves per side, or four interlocking curves per side. These boxes make an elegant statement, whether you leave them plain and simple or add decorations and embellishments of your own choosing.
Valentine's Day: The Valentine Small 4 Curved-Edge Box is decorated with hearts and in the colors of Valentine's Day.
Project extra: Make the interlocking curves box in any size by following instructions at the bottom of this page for drafting a pattern.
Related craft: To make another style of interlocking box, see the Straight-Edge Interlocking Box craft project.
Choose a box to make. Download and print the pattern. The same pattern is used for the top and bottom of the box. For the larger 3½" to 3¾" boxes, print the pattern of your choice twice. The smaller 2¼" to 2½" box patterns only need to be printed once.
Use the Inset/Mask Templates pattern to make decorative inset cutouts for the boxes' sides and tops, or to use as masks for stamping and painting. You can make precise borders with these inset/masking templates, which are custom-made for the Interlocking Curves Box patterns.
Make a lightweight box by printing directly on cardstock. For a stronger box, print a black-and-white pattern on computer paper, and trace or transfer the pattern to cardboard before proceeding.
Patterns are Adobe PDF files. The Adobe Reader is available for free.
All of Aunt Annie's project patterns are designed to be printed on standard letter-size paper (8.5"x11" or A4). When printing from Adobe Reader, you may need to select Auto-Rotate and Center or Choose paper source by PDF page size to ensure the best fit.
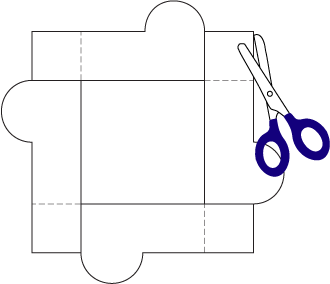
Cut around the box pattern pieces on the solid black outline. Try to cut accurately. The box will be stronger and fit together better if the cuts precisely follow the pattern outlines.
Using a straight edge and craft knife will make some of the cutting easier, but be sure to protect the table with a cutting mat or thick piece of cardboard. Caution: Be careful. Craft knives are sharp and should not be used by children.
Snip each corner on the dashed line. This creates the glue tabs needed to assemble the box.
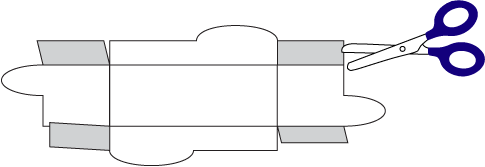
Tip: At this point, you may cover the cut-out box pattern with decorative paper. Cut paper that is a bit larger than the box pattern, and adhere it to the reverse side using a good spray adhesive.
Tip: The 2-curved boxes and 4-curved boxes have a left and a right depending upon whether you fold the printed pattern lines to the inside or outside. Be sure to make both the top and bottom the same way—left or right.
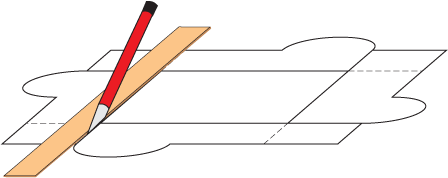
Score along each of the four fold lines.
To score: On cardstock, use the bone folder or empty ballpoint pen to make an indent—not a cut. If you are using light- to medium-weight cardboard or poster board, use a straight edge and a craft knife or scissors to make a "half-cut".
Fold one side along the score line, then unfold. Repeat for the other three sides. When using thick cardboard like Bristol board, fold back so that the score is on the outside of the box. Lighter cardboard can be folded either way.


Fold the cardboard into a box shape. Be sure that the glue tabs are on the inside. Glue the tabs to the sides of the box with a good craft glue.
The top and bottom of the top are identical. Repeat Steps 2 through 6 to create the second half of the box.
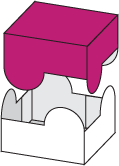
Use one half as the box top and the other as the bottom. Rotate the top one quarter-turn and slip the box halves together with all the curved sections on the outside. The top and bottom curves will lock together to form an s-shaped curve.
Decorate the box any way you like. Adding stickers and cutouts works well. You can also use markers, paint or colored pencils to decorate the box before gluing it together.
Tip: The curves can also be tucked inside the box for a tighter fit. Try tucking in the bottom curves or both the top and bottom curves.
That's it! Your box is done!

Making a pattern for an interlocking curves box is a bit challenging, but well worth the effort. The box requires one pattern that is used for both the top and bottom of the box. Besides a pencil and straightedge or ruler, you will also need a compass to make the pattern. You can draw the pattern directly on cardstock or cardboard, or you can make a paper pattern to transfer to cardboard.
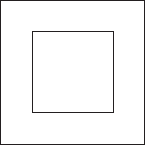 The pattern is based on a square.
In the center of the cardboard, draw a square the size of the box's
base.
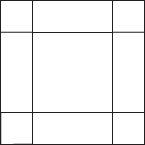 Extend the lines of the smaller square out to meet the sides of the larger square. The small squares in the corners, formed by these lines, are glue tabs. You will cut on one of the marked lines and fold on the other.
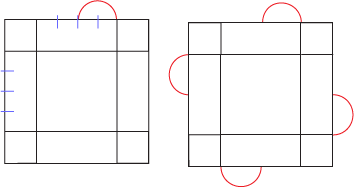 To give the box its distinctive curved look, you must make a half-circle on each side of the box. First, set the compass to ¼ the width of the sides,
excluding glue tabs. Then, place the compass tip on the top edge of the side, ¼ of the width from one side. Now, draw a half-circle above the top edge. Repeat on the other three sides.
Assemble the box following the instructions in this project.