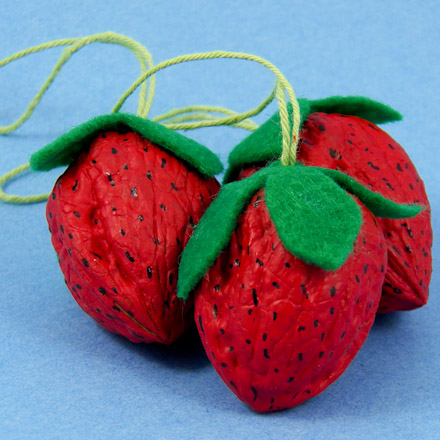
Make strawberries from walnuts in their shells painted red. This is a quick and easy project that both kids and adults will have fun doing! The strawberries can be used as decorations on gifts or around the house, and make a wonderful gift to brighten anyone's day.
Go beyond walnut strawberries and make strawberries from almonds and blueberries from hazelnuts. Get creative!
This craft is well-suited for family, group or classroom craft time and takes very little preparation by the adult or teen leader.
Gather the materials needed to make your walnut strawberries. If you are doing this project with a group of children or adults, pre-cut the 2" (5 cm) felt squares. To make the craft go faster, paint the walnuts in advance.
Paint as many walnuts as you want strawberries, and set aside to dry.
Cut a 2" (5 cm) square of green felt to make a leaf cap for each strawberry. For a simple cap, cut a cross shape from the felt.
For a more leaflike look, fold the square in quarters. Hold the corner with the folds, and use your scissors to round the two adjacent corners. Open the folded felt to reveal four leaves. Use your scissors to smooth the leaves, if needed.
Fold the leaf cap in half and make a small snip in the center for the "stem."
Cut an 8" to 12" length of ribbon or string for each strawberry. This is the "stem" and hanger for the strawberry. Double the ribbon or string and glue the cut ends onto the walnut. If possible, push the cut ends into the walnut's center crack.
Push the loop end of the ribbon or string through the slit you made in the leaf cap. Push the leaf cap down, and use a drop of glue on the back of each leaf to adhere it to the top of the walnut.
Use the black marker to add small dots or dashes that look like the seeds on the outside of a strawberry.
That's it! Aren't these strawberries sweet?
